
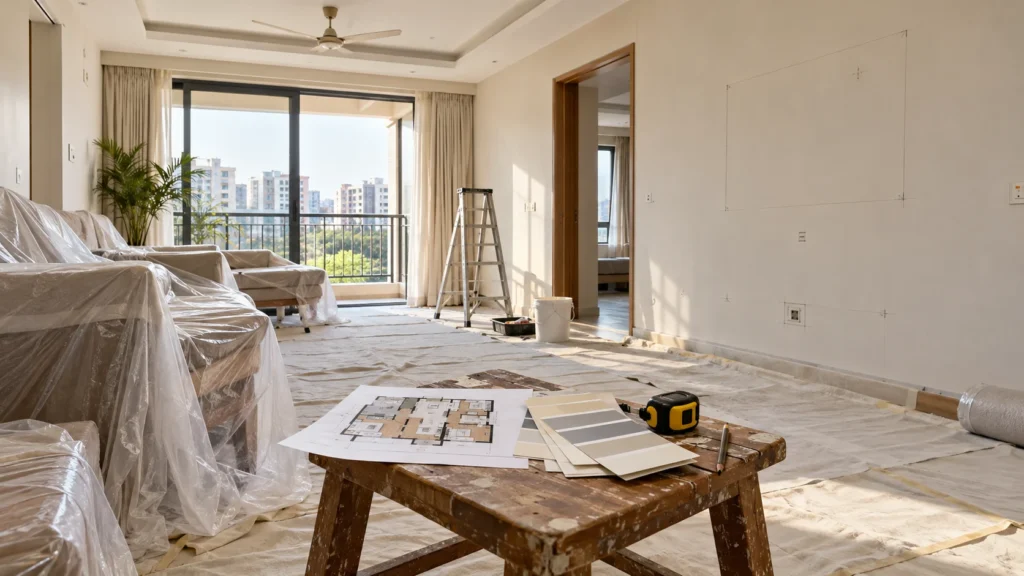
Renovation projects rarely go wrong on the day work begins. They go wrong in the weeks before, when scope is vague, the building has not been inspected, the budget has no reserve and nobody has written down what has been agreed. This interior design checklist before renovation is built around that stage. It walks through the nine things worth settling before the first wall is broken or the first carpenter arrives, in roughly the order they should be done.
The checklist works for a single room, a full apartment or an independent house. Some items will matter more in older buildings, and some less in new ones, but none of them is optional if you want the project to finish close to the plan, the budget and the schedule you set.
Why a Checklist Helps More Than Inspiration
Most homeowners start renovation by collecting pictures. That is a fine way to find a style, but it does not tell you what the walls hide, how much the work will cost, who is responsible for each task or how long you will be without a working kitchen. A checklist covers those gaps. It forces decisions about things that are expensive to change later and leaves the decorative decisions, which are cheap to change, for the end.
Stage 1: Define the Scope and Goals
Be clear about why you are renovating
A renovation to fix leakage and worn wiring is a different project from one to add storage and a modern kitchen, and both differ from a cosmetic refresh before a sale. Write the reason down in one or two sentences. Every later decision should serve it.
Sort the work into three lists
Divide the work into must-do items, nice-to-have items and items for later. Must-do work usually covers safety, damp, wiring, plumbing and anything that stops the home from functioning. Nice-to-have work covers upgrades such as a new false ceiling or a feature wall. Items for later can be phased in once the main work is done. This sorting protects the budget when surprises appear.
Think about who will use the space
List who lives in the home and how they use it. Elderly family members may need non-slip flooring and better lighting. Children need storage and safe furniture edges. A person working from home needs a proper desk, sockets and quiet. The renovation should reflect real routines, not an imagined household.
Checklist for this stage
- The reason for renovating is written down
- Must-do, nice-to-have and later lists are made
- Each family member’s needs are noted
- Any vastu or personal preferences are listed, with firm points marked separately
Stage 2: Inspect the Property Before Planning
A design based on assumptions about the building will not survive contact with the building. Check the following before finalising any plan, ideally with a designer, a contractor or a qualified engineer.
Dampness and leakage. Look for stains, peeling paint, powdery salt deposits and a musty smell, especially near bathrooms, external walls, balconies and the top-floor ceiling. Fix the source before any finish goes on. Painting over damp hides the problem for a season at most.
Electrical wiring. Ask a qualified electrician to assess the condition of the wiring, the capacity of the main supply and the protection devices in the distribution board. Older homes often have limited capacity that cannot handle modern loads such as several air conditioners, a geyser and a modular kitchen.
Plumbing and drainage. Check water pressure, pipe condition and drain slopes. Concealed pipes that are old or corroded are cheaper to replace while walls are open than afterwards.
Walls and structure. Never remove or alter a wall without confirming whether it is load-bearing. Structural changes need professional assessment, and in apartments they often need permission as well.
Floors, ceilings and windows. Check for hollow tiles, uneven floors, cracks in the ceiling and windows that do not close or seal properly. These affect finishing choices and sometimes the scope of civil work.
Checklist for this stage
- Dampness and leakage points are identified
- Wiring and load capacity are assessed by a qualified person
- Plumbing condition is checked
- Load-bearing walls are confirmed before any changes are planned
- Floors, ceilings, windows and doors are inspected
Stage 3: Check Permissions and Practical Constraints
Practical constraints can delay a project as much as design decisions can. Before work starts, find out the following.
For apartments, check the housing society’s rules on renovation, including permitted working hours, restrictions on structural changes, rules for moving materials through lifts and common areas, and any deposit or intimation required. For rented homes or offices, check the lease and get the owner’s written approval for any alteration. For independent houses, confirm whether any local approvals apply to the changes you plan. Requirements vary by property and by area, so ask the society, the owner or the local authority directly instead of assuming.
Also plan where debris will go, where materials will be stored, and whether the access route can handle large items such as wardrobes, kitchen units and stone slabs.
Checklist for this stage
- Society, owner or local authority requirements are confirmed
- Working hours and material movement rules are known
- Storage space for materials and a debris disposal plan are arranged
Stage 4: Set the Budget and a Contingency
A renovation budget is more useful when it is broken into categories than when it is a single number. Ravo Interior’s interior design cost guide for Bhopal notes that many homeowners are caught off guard by costs that were not included in their first quotation, and it recommends getting detailed, itemised quotes from several designers and comparing them element by element instead of by total alone. That advice applies to any renovation.
A workable budget has these heads, and each one should be confirmed with whoever is quoting.
| Budget head | What to confirm |
| Civil work and demolition | Scope of breaking, repair, plastering, debris removal |
| Electrical and plumbing | Rewiring, new points, fixtures, supply and labour |
| Waterproofing | Areas covered, method, warranty, curing time |
| Carpentry and furniture | Materials, hardware brands, finishes, installation |
| Lighting | Fittings supplied, number of points, dimmers or controls |
| Paint and wall finishes | Number of coats, surface preparation, brand and grade |
| Flooring and tiling | Material, laying, skirting, wastage allowance |
| Appliances and fittings | What is included and what you buy separately |
| Transport, labour and cleaning | Whether included or charged separately |
| Contingency | A reserve for the unexpected |
A commonly cited rule of thumb is to keep a reserve of roughly 10 to 15 percent of the total for unforeseen costs. Older buildings with unknown wiring or damp may need more, so adjust it after the inspection.
Checklist for this stage
- Total budget is fixed and divided into categories
- A contingency reserve is set aside
- Itemised quotations are requested, with the same scope for each
- Payment is planned in stages tied to progress
Stage 5: Plan Layout and Services Before Finishes
This is the stage that most homeowners rush, and it is the one that decides how the home works for the next ten years.
Floor plan and furniture
Draw the plan to scale, showing doors, windows and the proposed position of every major piece of furniture. Check that doors and shutters can open fully and that walking paths are clear. A plan on paper costs nothing to change, and the same change after installation costs a great deal.
Electrical points and switches
Mark switches, sockets and light points in relation to the furniture, so that nothing ends up behind a wardrobe or too far from the bed or desk. Add enough sockets in the kitchen, near the sofa, beside the bed and at the study desk. Plan dedicated points for air conditioners, geysers and heavy appliances.
Plumbing and drainage
Confirm the position of every tap, basin, shower, washing machine and kitchen sink before tiles are chosen. For kitchens, Ravo Interior’s modular kitchen design ideas for Bhopal homes point out that the sink, hob and refrigerator should form an unobstructed work triangle, which is worth fixing in the plan before any cabinet is ordered. The same article highlights lighting as a common weak point in kitchens.
Lighting plan
Plan lighting in layers, with general ceiling light, task light for the kitchen counter, study desk and dressing area, and accent light for features. A single central fitting in each room leaves shadows and glare.
Storage and ventilation
List what you own, and plan storage to suit it. Built-in wardrobes, loft storage and bed storage usually give more capacity than loose furniture. Check ventilation in kitchens, bathrooms and bedrooms, and plan outdoor unit positions for air conditioners before walls are finished.
Checklist for this stage
- A scaled floor plan with furniture is approved
- Electrical points are marked against the furniture layout
- Plumbing positions are confirmed
- A layered lighting plan is made
- Storage and ventilation are planned
Stage 6: Choose Materials and Finishes Sensibly
Materials should be chosen to match the room’s conditions, not just its appearance. Moisture-resistant boards and finishes belong in kitchens and bathrooms. Durable surfaces belong in high-use areas, and good hardware belongs wherever things open and close daily. Order large items early, because lead times for tiles, stone, custom furniture and appliances can delay the whole schedule.
Ask for physical samples and view them in your own lighting. A colour that looks right in a showroom can look quite different at home. Keep a small quantity of spare tiles and laminates for later repairs.
If you care about energy use and indoor air quality, Ravo Interior’s guide to sustainable interior design options for Bhopal homes discusses thermal insulation, natural light and low-VOC paints. And if the budget does not stretch to a full renovation, its article on budget-friendly home makeover ideas covers lower-cost ways to refresh a room, including paint, cushions, mirrors and an updated entryway.
Checklist for this stage
- Materials are matched to each room’s conditions
- Samples are viewed at home, in your own light
- Long-lead items are ordered early
- Spare tiles and laminates are kept
Stage 7: Hire People and Fix Terms in Writing
Most renovation disputes come from unclear terms. Settle these before signing anything.
Decide whether you need a designer, a contractor or both. A designer plans the layout, services and finishes and coordinates the work. A contractor executes. Some firms offer both under one roof. Whoever you choose, ask for an itemised quotation, a written scope of work, a timeline with milestones, a payment schedule linked to progress, the warranty terms and a clear process for handling changes and defects.
Ravo Interior’s article on choosing the right designer for your home advises setting a budget openly and using the first consultation to ask about working style, methods and past projects, and to watch for red flags. It is a useful list of questions to bring to that first meeting.
Ravo Interior is an interior design firm based in M.P. Nagar, Bhopal. Its residential interior design services page covers living rooms, bathrooms, modular kitchens and pooja rooms, and describes work on new flats as well as renovation projects. The firm’s website describes a four-step process of consultation, 3D design, in-house production and installation, and states 200+ completed projects and a team of 50+. You can read more on the about page and see completed work in the project gallery. If your property is outside Bhopal, confirm availability for the exact location at the first conversation. The services page lists the categories of work offered, and the contact page has the details for getting in touch.
Checklist for this stage
- Designer and contractor roles are clear
- Itemised, comparable quotations are in hand
- Scope, timeline, payment schedule and warranty are in writing
- Designs and 3D visuals are approved before production starts
Stage 8: Understand the Sequence and Timeline
The order of work matters, because later trades can damage the work of earlier ones. The sequence varies by project, but a typical order looks like this.
- Protect floors and furniture, and clear the area
- Demolition and civil changes
- Concealed plumbing and electrical conduits
- Waterproofing, with proper curing time
- Plastering and wall preparation
- False ceiling work
- Flooring and tiling
- Carpentry and built-in furniture
- Painting and wall finishes
- Fixtures, fittings, lights and appliances
- Deep cleaning, snagging and handover
Ask your designer or contractor for a written schedule that follows an order like this, with expected durations and the dependencies between stages. Allow extra time for waterproofing curing, material delivery and festival or monsoon interruptions.
Checklist for this stage
- A written schedule with milestones is agreed
- Curing and delivery times are built in
- A snagging walk-through is planned before final payment
Stage 9: Prepare for Living Through the Work
Renovation brings dust, noise and disruption. Plan how the household will manage.
If the kitchen will be out of use, arrange a temporary cooking setup or plan meals around it. Protect or move valuables, electronics and sensitive furniture. Keep children and pets away from work areas. Seal off rooms that are not being worked on, and plan for water and power interruptions. If the disruption is large, consider staying elsewhere for the noisiest phase.
Checklist for this stage
- A temporary kitchen or meal plan is ready
- Valuables and furniture are protected or moved
- Dust barriers and safety arrangements are in place
- Family routines are adjusted for noise and interruptions
The Final Pre-Start Checklist
Before work begins, confirm that every one of these is true.
- The scope and reason for renovation are written down
- The property has been inspected for damp, wiring, plumbing and structure
- Permissions and society or owner approvals are in place
- The budget is divided and includes a contingency reserve
- A scaled plan with electrical, plumbing and lighting layouts is approved
- Materials and finishes are chosen, and long-lead items are ordered
- Quotations are itemised and compared, and a written contract is signed
- A schedule with milestones and a payment plan is agreed
- The household has a plan for living through the work
Frequently Asked Questions
What should I check first before renovating?
Inspect the property for dampness, wiring condition, plumbing and structure, and define the scope and budget. These steps shape everything that follows.
How long does a renovation usually take?
It depends on the size, the scope and the delivery time of materials. A single room is far quicker than a full apartment, and structural or waterproofing work adds time. Ask for a written schedule that includes curing and delivery periods.
How much contingency should I keep?
A commonly cited rule of thumb is roughly 10 to 15 percent of the total, with more for older buildings where hidden problems are likelier. Adjust it after the inspection.
Do I need a designer for a renovation?
Not always, but a designer adds the most value at the planning stage, when layout, services and storage can still change. Even a short consultation can prevent expensive mistakes.
Can I live in the house during renovation?
Often yes for small or phased projects, but dust, noise and loss of the kitchen or bathrooms make it difficult in larger ones. Plan temporary arrangements, or move out for the heaviest phase.
Start With the Plan, Not the Hammer
A renovation that begins with a clear scope, an inspected building, a realistic budget and written terms usually finishes closer to what the owner expected. The checklist above takes a few days to work through, and it can save weeks and a significant amount of money later.
If you are planning a renovation and want to talk through your scope, explore the home design work listed on the Ravo Interior website or contact the team to discuss your project. For more planning advice, the interior design articles on the Ravo blog are a useful next read.